How to Assemble a Professional Pedicure Chair Step by Step?

Time:2026-08-19 Author:Oliver
0%

As the demand for spa services continues to grow, having the right equipment becomes essential. Understanding how to assemble a professional pedicure chair is crucial for spa owners and technicians alike. This chair is not just a piece of furniture; it represents comfort and luxury for your clients.

Crafting a calming environment requires attention to detail. When assembling your chair, small missteps can affect its functionality. Even though the process may seem straightforward, it’s vital to follow each step carefully. Look out for missing parts or confusing instructions. They can lead to frustration.

Building a professional pedicure chair involves more than just physical assembly. It is about creating an inviting atmosphere for clients. Ensuring stability and comfort is key. Pay attention to how components fit together. The right assembly can enhance your service quality. Remember, a well-assembled chair directly impacts customer satisfaction. Taking the time to master how to assemble a professional pedicure chair will ultimately benefit your business.
How to Assemble a Professional Pedicure Chair Step by Step?

Understanding the Components of a Professional Pedicure Chair

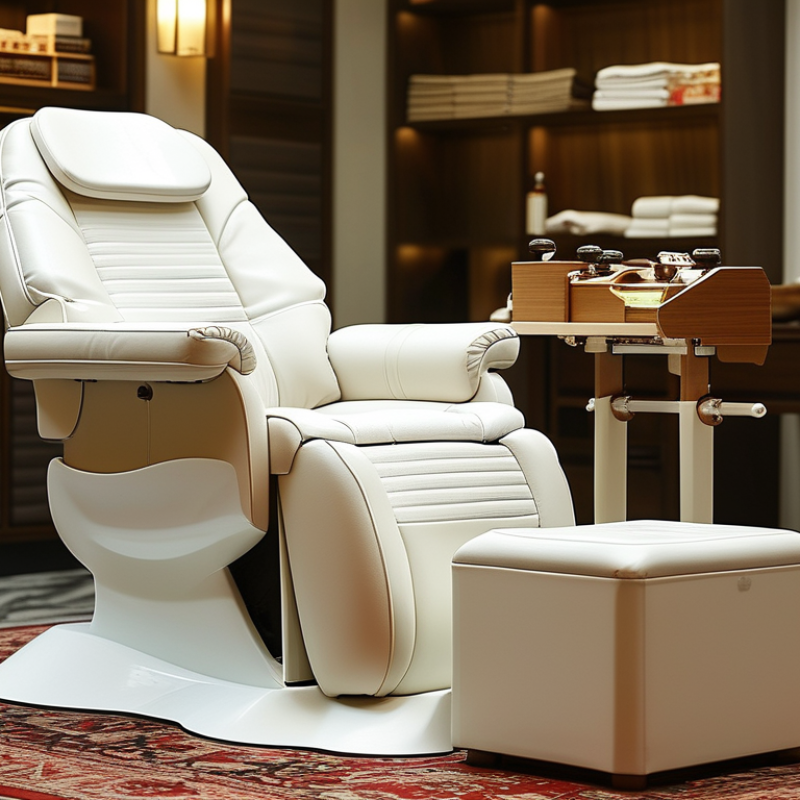
When discussing professional pedicure chairs, it's crucial to understand their components. A typical chair includes an adjustable reclining seat, a footrest, and a basin for soaking feet. Each part serves a purpose in enhancing the client experience. Reports suggest that ergonomic design can significantly reduce strain for both the client and the technician. Investing in a quality chair can lead to higher client satisfaction, possibly increasing return visits by 30%.

The basin often features a drainage system. A well-designed drainage helps maintain cleanliness and prevents water accumulation. Technicians frequently note that chairs with easy-to-clean surfaces reduce their workload and enhance hygiene. Regular maintenance checks are essential. Overlooking this can lead to issues that may affect client safety.

**Tip:** Regularly inspect the hydraulic lift mechanism. It can wear out over time. Keeping it in good working order is vital for your chair's functionality.

Another important component is the upholstery material. High-quality upholstery not only enhances comfort but also offers easy cleaning. Leather alternatives are preferred for durability and stain resistance. However, they can wear out faster with heavy use. Balancing aesthetics and practicality is key.

**Tip:** Consider using a protective cover. This can prolong the life of your chair's upholstery, making it a worthwhile investment.

How to Assemble a Professional Pedicure Chair Step by Step? - Understanding the Components of a Professional Pedicure Chair

Component Description Tools Required Assembly Steps
Base The foundation of the pedicure chair that supports the entire structure. Wrench, screwdriver Attach the legs to the base using bolts and nuts.
Seat The portion where the client sits, usually padded for comfort. Screwdriver Secure the seat to the base via the provided mounting brackets.
Footrest Adjustable part for clients' feet to rest comfortably. Wrench, screwdriver Attach the footrest to the chair using hinges.
Sink/Basin Holds water for soaking feet, typically made of acrylic. Screwdriver, water hoses Connect the sink to plumbing and secure it to the base.
Massager Provides vibration and massage functions for relaxation. Screwdriver, power connectors Install the massager at the intended section and connect the wires.

Essential Tools and Equipment for Assembly

Assembling a professional pedicure chair requires several essential tools and equipment. You'll need a basic tool set, including a screwdriver, wrench, and pliers. Having a level handy can ensure your chair is even on any surface. A soft cloth for cleaning any parts before assembly is also vital.
When you gather your tools, make sure to read the manual thoroughly. It provides crucial insights into specific assembly requirements. Also, organize each part. By grouping similar components together, you can easily identify what you need during the process.
Tips: Take a break if you feel stuck. This helps clear your mind. Assembling the chair is a meticulous task. Don't rush it. Look out for misaligned pieces, as this can complicate the setup. Additionally, ask a friend for help; two heads are often better than one when dealing with bulky items.

Step-by-Step Guide to Assembling the Base of the Pedicure Chair

When assembling a professional pedicure chair, the base is a crucial component. It provides stability and support during treatments. Professionals recommend ensuring the base is properly secured before moving on to other parts. A report by the Beauty Industry Association notes that improperly assembled furniture can lead to accidents and increased maintenance costs.

Start by laying out all the components. Check the manual for specific parts required for the base. Many users overlook this step, which can lead to confusion later. Assemble the legs first by aligning them with the designated slots. Use the screws included to secure them tightly. Remember, a loose connection might compromise the chair's integrity.

Tips: Always hand-tighten screws before using a power tool. This prevents over-tightening, which can damage the materials. It's also beneficial to have an extra pair of hands. Asking a colleague for assistance can save time and help ensure everything fits properly.

As you work, inspect each component. Look for any defects or missing parts. Address these issues promptly, as they can affect the chair’s functionality. Developing a keen eye for detail during assembly can enhance the overall quality of your setup. Being meticulous in this process can lead to a longer-lasting and safer pedicure experience for clients.

Connecting Electrical and Plumbing Systems Safely

When assembling a professional pedicure chair, safety is crucial, especially when connecting electrical and plumbing systems. Make sure to study the user manual. Get familiar with all components before starting. This will help prevent errors and ensure a smooth setup.

For electrical connections, turn off the power supply. Use high-quality connectors to avoid short circuits. It is necessary to check the voltage requirements of the chair. Incorrect voltage can damage the motor. Don't rush this step. Instead, double-check your work and seek guidance if needed. A licensed electrician can provide valuable insight.

When it comes to plumbing, ensure all hoses are securely attached. Leaks can cause water damage and may pose safety risks. Use plumber's tape on threaded connections to minimize this risk. Test the connections thoroughly before use. Paying close attention to these details can save time and money later on. Remember that thorough work leads to reliable performance.

Final Adjustments and Quality Checks for Optimal Performance

Final Adjustments and Quality Checks for Optimal Performance

When assembling a professional pedicure chair, final adjustments are crucial. Double-check connections and ensure all screws are tight. A loose part can impact safety and comfort. This step helps maintain quality and reliability in the long run, ensuring an enjoyable experience for clients.

Make sure the chair’s height and angle are adjustable. This customization accommodates different user preferences. A well-aligned chair reduces strain for both the technician and the client. Pay attention to the placement of the footrest as well; its height should align with the chair’s base for a seamless experience.

Tips: Test the chair thoroughly after assembly. Sit in it yourself or ask a colleague to test it. If it feels unstable, reassess your adjustments. Regular quality checks can prevent long-term issues. Keeping maintenance logs will also help track any recurring problems and improve reliability.

FAQS

: What are the main components of a professional pedicure chair?

: The main components include an adjustable reclining seat, a footrest, and a soaking basin. Each part enhances client experience.

Why is ergonomic design important in pedicure chairs?

Ergonomic design reduces strain on both clients and technicians. It can lead to higher client satisfaction and more return visits.

How can cleanliness be maintained in a pedicure chair?

A good drainage system in the basin helps prevent water accumulation. Regular maintenance checks are essential for hygiene.

What upholstery material is recommended for pedicure chairs?

High-quality upholstery enhances comfort and is easy to clean. Leather alternatives are durable but may wear out faster.

How can the lifespan of upholstery be prolonged?

Using a protective cover can help extend the life of the chair’s upholstery. This makes it a smart investment.

What should be done before assembling the pedicure chair?

Lay out all components and check the manual for required parts. Overlooking this can cause confusion later.

Why is it important to secure the base of the chair properly?

A properly secured base provides stability and prevents accidents. Loose connections can compromise the chair's integrity.

How should screws be handled during assembly?

Hand-tighten screws before using power tools. This helps avoid over-tightening, which could damage materials.

What should be inspected during chair assembly?

Inspect each component for defects or missing parts. Addressing these issues promptly is crucial for functionality.

How can attention to detail affect the pedicure experience?

Being meticulous during assembly enhances the chair's quality. This can lead to a longer-lasting and safer client experience.

Conclusion

Assembling a professional pedicure chair requires a clear understanding of its components and the appropriate tools for the task. The article titled "How to Assemble a Professional Pedicure Chair Step by Step?" outlines essential equipment needed for the assembly phase and guides readers through each stage of the process.

The step-by-step guide begins with assembling the chair's base, ensuring a solid and stable structure. It then addresses the safe connection of electrical and plumbing systems, critical for the chair's operational efficiency. Finally, the article emphasizes the importance of making final adjustments and conducting quality checks to ensure optimal performance, providing a comprehensive resource for anyone looking to successfully assemble a pedicure chair.

Oliver

Oliver

Oliver is a seasoned marketing professional with a wealth of expertise in driving brand awareness and engagement. With a deep understanding of our company's product offerings, he consistently delivers high-quality content that enriches our professional blog. His insights not only shed light on......